Recipe Box – Thanksgiving Bone Broth

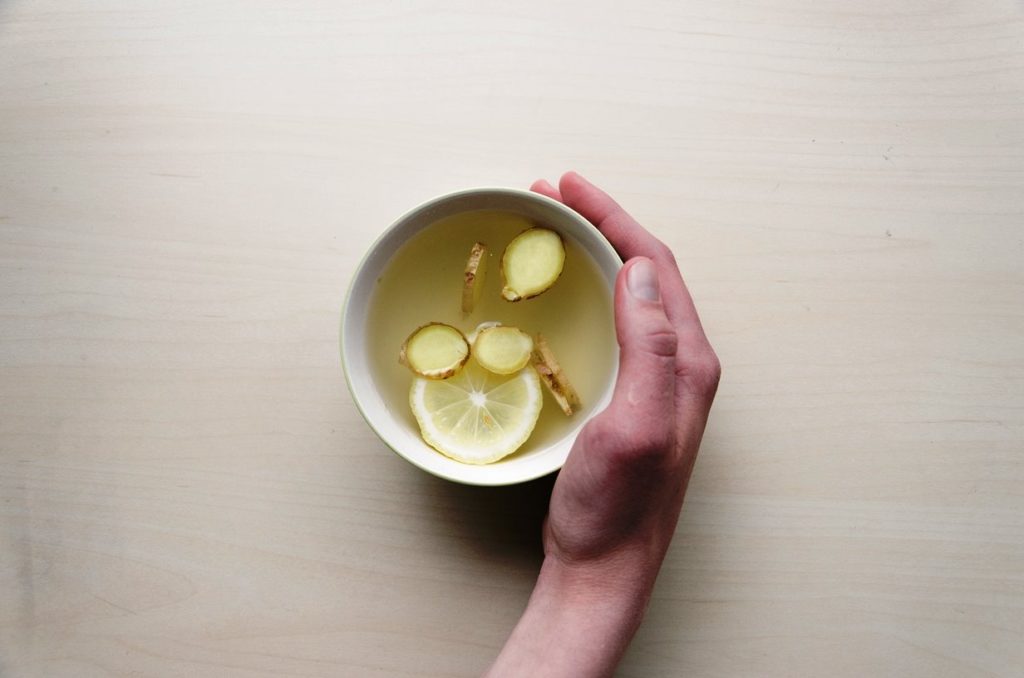
Did you save the turkey carcass from Thanksgiving promising yourself you’d be all Food Network-y and do something with it? Maybe you thought you’d make stock, or even try jumping on the bone broth bandwagon if you haven’t already. Guess what?! ME TOO!  But why bone broth, specifically? Bone broth is special because the process of making it extracts the collagen in the carcass and collagen helps to heal all kinds of your parts. Parts like your intestines and joints, and it makes a great, easy breakfast, especially on cold winter mornings.

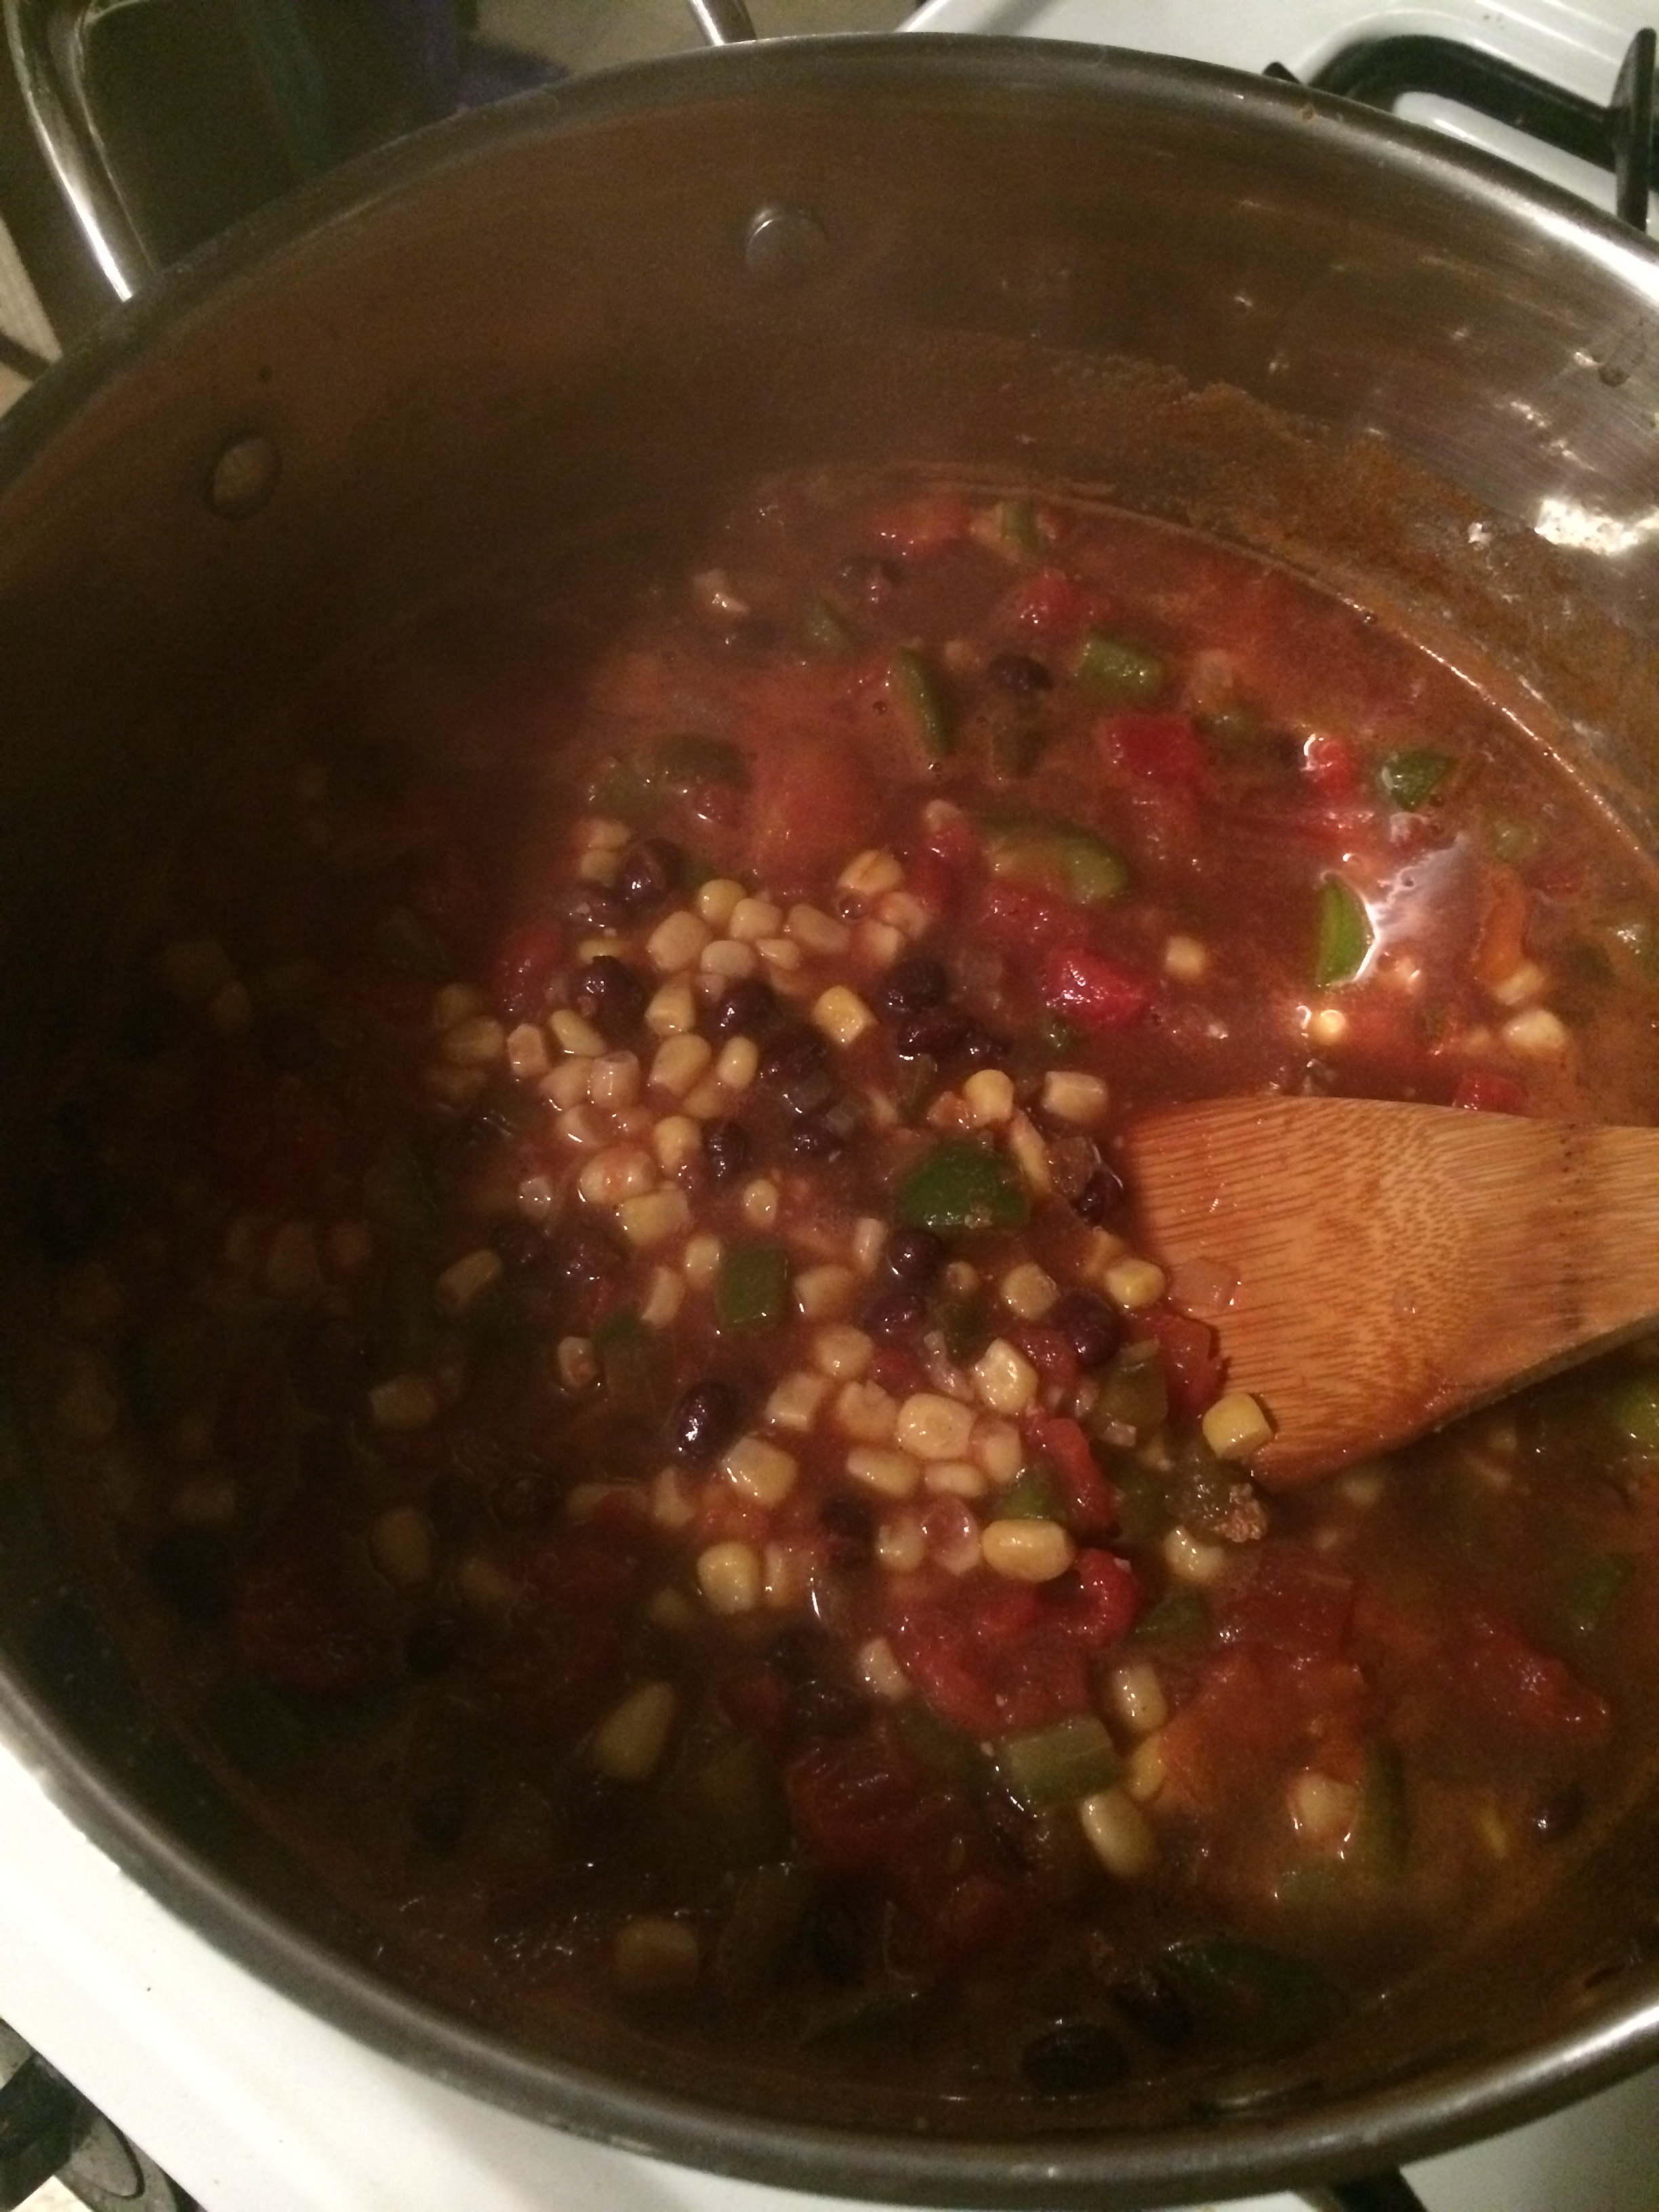
I’ve been on this wagon for a few months and I’ve gotten a bit bored with my standard recipe. I was super excited to have a turkey carcass to use and to mix it up with some fresh herbs. The carcass was so big (we had a 17.75 pound bird) that it made two batches of bone broth. Don’t forget the apple cider vinegar. The vinegar is the magic ingredient that pulls all the good stuff from the bones.

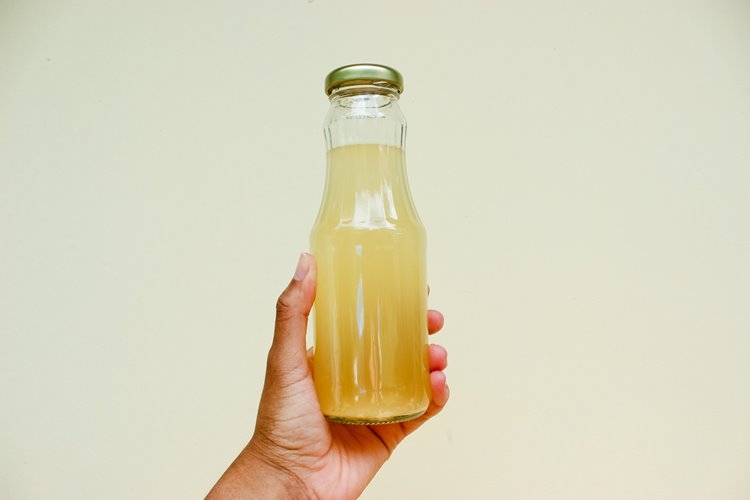
Reuse glass bottles for the perfect fast breakfast or recovery drink. Reheat for 2 minutes and BOOM!

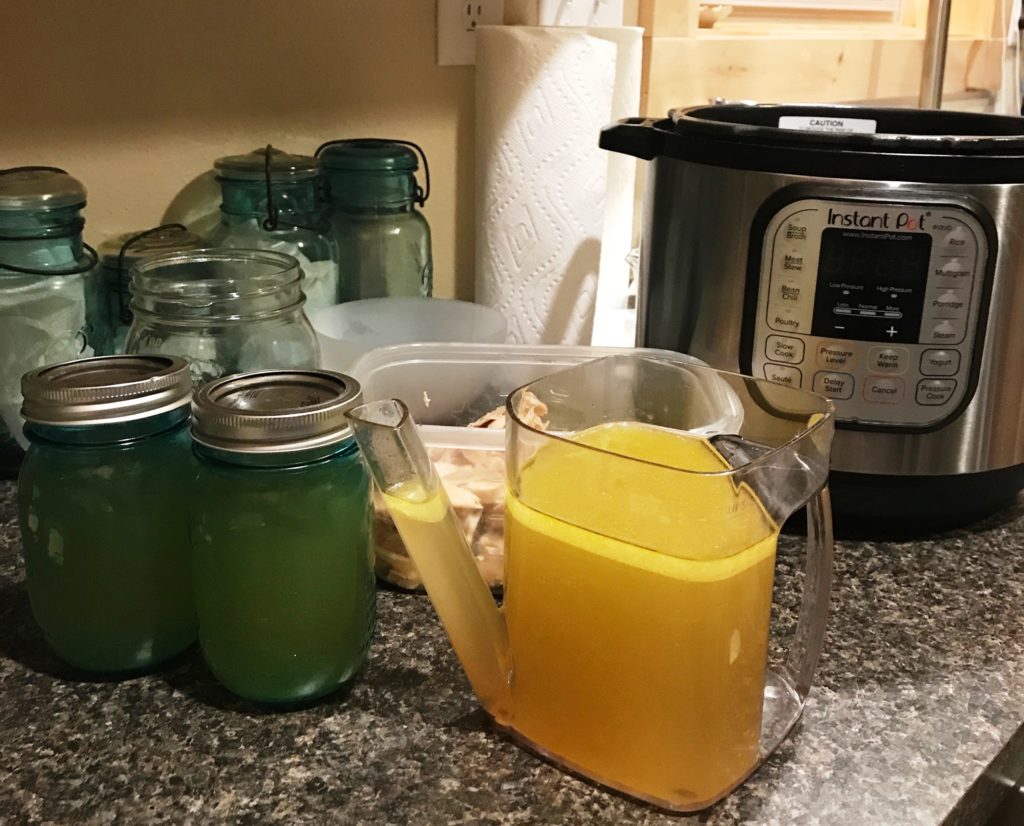
I do use a six quart Instant Pot when I make bone broth because the stove top or Crock Pot method takes twelve hours for poultry based bone broth. The long cooking time is needed to extract all the collagen, and having a gas stove burner on for twelve hours makes me nervous. Instant Pot to the rescue! This method only takes two hours.  If you’re using the stove top or a Crock Pot, follow all assembly instructions and cook for twelve hours minimum.

Thanksgiving Bone Broth

  • Turkey carcass, cut into pieces so it will fit in your pot
  • 3 Garlic Cloves, Smashed
  • Sage, Fresh
  • Thyme, Fresh
  • 1/2 Onion including skin
  • 3 Large Carrots cut to fit in pot
  • 2 Stalks of Celery cut to fit in pot
  • Mushrooms, handful
  • 1 Tbsp. Apple Cider Vinegar
  • Salt
  • Pepper
  • Water

Add carcass to pot first, then add all other ingredients, adding the apple cider vinegar last. If using an Instant Pot, fill it with water to the max fill line. Lock the lid in place, select “Pressure Cook” and , and set the timer for 2 hours.

If using a pot or Crock Pot, leave two inches of water below top of pot and watch pot throughout cooking, you may need to add water as it evaporates. Cook for twelve hours minimum.

After your broth is done, you’ll need to strain it. All you want is the liquid. Once my Instant Pot is cool enough to handle, I nest a colander in a metal mixing bowl, and use a slotted spatula to remove the large bits of bones, veg, and meat from the pot. Once I’ve gotten most of that removed, I nest a fine sieve inside another large bowl, then pour the broth through the sieve to strain the broth of smaller bits. The next step is to pour the strained broth into a fat separator. If you don’t have one of those, you can spoon off the fat sitting on top of the broth once it separates. With my separator, I can pour off the fat.  I toss the bones and veg in the trash and add whatever is at the bottom of that bowl to the strained broth. Then, I pour my broth into 12 oz mason jars. (There is a lot of pouring going on).

This turkey version is tasty, and I’ll be sure to put the carcasses from my husband’s meat smoking experiments into future recipes. Bone broth has become a routine part of my mornings. I appreciate its unassuming gentleness and subtle healing properties.

Recipe Box – Paleo Chicken & Mushroom Skillet

Since seeing a nutritionist, I’ve been told to start eating a Paleo diet. While giving up carbs and sugar is the hardest thing I’ve ever quit aside from smoking,  it has forced me to expand my palette which is a great thing.  I’m eating things I never did before! Things like English cucumbers, raw red peppers, and mushrooms. .  Also, the only real method of cooking I have available to me at the moment is my electric skillet. Therefore, meals must be two things: paleo, and able to cook in one pan. So when I stumbled across this recipe for Paleo Chicken and Mushroom Skillet, I was stoked to try it.  We paired it with a Seeds of Change Brown Rice & Quinoa packet, and a fresh, sliced cucumber. We yum-yummed the shiz out of this dish! My husband and I loved it.


Photo credit goes to I Breathe, I’m Hungry as I completely forgot to snap photos while I was cooking. Totally typical of me.


This recipe comes from the food blog I Breathe, I’m Hungry which offers low carb, keto, paleo, and gluten-free recipes.  I just discovered this blog, but if this recipe is any indication of the yumminess of her cuisine, I’ll be back for sure!

21 Day No Sugar Challenge

Today, we’re kicking off our 21 No Sugar Challenge! I decided to do this for myself when I discovered my glucose levels were wonky after my annual routine blood work. Diabetes doesn’t run in my family, but my addiction to baked goods is likely to blame. I knew it was time to cut back on the processed sugar, and I knew the best way for me personally to do that was to go cold turkey. I’m not doing any sort of program, I’m just going to do my absolute best to cut sugar from my diet for the next 21 days.

Tears are being shed for all the future donuts I will not eat.

I know this is going to be super hard for me. But I also know this is crucial for my health. I’m 41, and it’s now or never to kick my sugar addiction.

Here’s my strategy:

  • Continue drinking more water to help flush my system (thanks, Hydration Challenge!)
  • Drink more hot herbal and green teas that don’t need sweetener
  • Chew sugar free gum when I get a craving
  • Eat more fruit
  • Cut white sugar and white flour food items

Here’s what I hope to gain by day 22:

  • A shift in my taste buds toward less sugar cravings
  • More stamina instead of the crash and burn from glucose energy
  • Overall feeling of increased health and wellness
  • A new perspective on diet
  • Lots of yummy new recipes!

This ain’t gonna be easy, folks. I expect there will be tears. Especially when my severe PMS cravings kick in. Some of the challenges I’m expecting are:

  • Not having my morning tea routine
  • Not eating chocolate in any form
  • Not having scones with my tea
  • Making sure I carefully read all labels

Speaking of Labels…

I know what I’m getting into, and I know my body. I quit smoking thirteen years ago, and to this day that was the hardest thing ever. After years of trying to quit with everything from medications, patches, and gum to sunflower seeds, toothpicks, and learning to knit, I learned that the only thing I really need is motivation and determination. I’ve never been so motivated to change my eating habits as I am now.

Are you motivated too? No matter what your fitness goal is for 2018, it can benefit from eating less sugar. I’d LOVE to have you join me on this journey. It’s free. I’m not selling anything, it’s all about accountability and commiseration. It’s going to be hard and challenging, but fun and oh so worth it. There will be a giveaway at the end, too, and we all love winning stuff! So come along with me on this sugarless trip, and tell me what you’re motivated to change in 2018. Together, we can do it!

To join the challenge, enter our giveaway by clicking the picture above or here and interact with us on Instagram, Twitter, and Facebook. I’m here to support you as you chase your goals, so TELL ME ALL ABOUT THEM. Let’s do this!

Recipe Box: Beef Stir Fry

Friends, today is a hard day. I don’t want to preach or soap box, but I needed to say that if you’re feelings are raw or your heart hurts or you’re feeling vulnerable this morning, know that you are not alone. I’m feeling that right alongside you – and I know that the best way to move forward is to take care of each other. We’ve all got each other, no matter our differences. We can heal.

I’m finding it hard to write with my usual sense of joviality today, but I do have a recipe to share, and it’s a good one and definitely hits the mark on the healthy/delicious scale. One of our go-to meals is stir fry, but its rare that we make it with anything but chicken. And if I’m being quite honest, I’m over all of the chicken. Too much chicken. All the time.

So, in meal planning for this week, we took a stroll through Costco and picked up a few cuts of meat that we don’t usually get, namely a massive amount of chuck roast. Which is perfect for throwing in the slow cooker and making things like Italian beefs, and, as it happens, stir fry.

img_3169

Ingredients:

Broccoli (4 cups, ish), chopped

Snow peas (a couple handfuls)

Whole red and yellow peppers, sliced

1 large white onion, diced

1.5 lb Chuck Roast

Salt

Pepper

Ginger (to taste)

Onion powder (to taste)

Cayenne (to taste)

Soy sauce

Teriyaki sauce

Sesame oil (JUST A LITTLE)

Kikkoman Stir Fry Sauce

Lime juice

Pull out your crock pot, tenderize that chuck roast to within an inch of it’s life. Seriously. Slice into inch cubes. Toss in the crock pot with soy sauce and teriyaki and a liiiiiittle bit of sesame oil. Also throw in your seasonings, to taste. Let that sit for… a few hours. Like, maybe four? Or five? Just let it ride for a while. When it’s broken down and falling apart, it’s ready.

When your meat is ready, get your veggies all chopped up. Throw them all in a wok (or sautee pan, whatever), on medium heat with olive oil covering the bottom. Add a few squirts of lime juice. Stir occasionally, making sure to evenly distribute oil and juice on all the veggies. Cook only until warm through – they should still be pretty crisp. Drop the meat on top, stir it up and feed your face.

You will have a BUNCH of foodz and in my house, that means leftovers, which are the best.

Recipe Box: Foodball Edition

When I sat down to write today, I really wanted to follow up on Jenn’s post about the Broncos and share my love of football too… but since I haven’t run a race in many months, I needed a different angle.

Enter food.

Of course.

Now that football season is in full swing and fantasy teams have been drafted, every Sunday at my house has become Foodball day. Clay and I spend Sunday mornings cooking and preparing snacks for the nearly ten people that pile on our couch starting at 1:00 to binge on beer, chili, chips and sports. (To be fair, I usually get a workout in on Sunday morning, so that the laziness of the rest of the day doesn’t catch up to me.)

foodball

He’s a Browns fan, but he humors me and cheers for the Packers, too.

The menu typically includes Clay’s Turkey Chili (which has no recipe… otherwise I’d share that with you today), Buffalo Chicken, guac, chips, some kind of dessert (last week I made Cleveland Brownies… get it?), pizza and other snacks. It ends up being quite a spread, but you need that kind of sustenance for 8+ hours of football viewing.

The chili is always a hit, but the sleeper favorite is the Buffalo Chicken. This shredded crockpot dish is a regular in our house because it’s so so so easy to make, and can be used in a lot of different ways. We like to put the shredded chicken on pizza, over salads, on a bun, in a wrap, or even eat it plain.

All you need is:

  • Boneless, skinless chicken breasts (3-4)
  • Your favorite Buffalo sauce (we’ve used Frank’s and Wegmans brands and love both)
  • Ranch seasoning packet
  • Your crockpot. Duh.

Since we usually prepare our Buffalo Chicken for meal prep or parties, we typically use 4-5 chicken breasts, though you can just do 2-3. We usually go through a whole bottle of Buffalo sauce and a complete seasoning packet, but if you use less chicken, you just need enough sauce to coat and cover it a little. The seasoning can be cut in half, too.

Place your chicken boobs in the crock pot, cover with Buffalo sauce and Ranch seasoning, and cook on high for 4-6 hours, or on low for 6-8 hours. You can start checking it after about 4 hours to see if it’s cooked through and ready to shred. I shred it in the crock pot so the chicken can soak up more of the Buffalo sauce, and then I keep it on warm when we’re serving to a group. If it’s for meal prep, I’ll shred it, leave it to cool down a bit in the crockpot and then move it to tupperware and the fridge.

Serve with tortilla chips, rolls, wraps or on pizza!

What’s your favorite tailgating or football food?

Recipe Box: Crock Pot Hawaiian Pork

I’ve written before about the importance meal prep plays in my life: it makes eating healthy very easy, and packing lunches in the morning for work is a cinch when all I have to do is grab a pre-made Tupperware on my way out the door.

My fiance and I have been pretty diligent for the last few months about prepping our lunches for the week on Sunday nights. For a long time, we were doing grilled chicken and broccoli. Let me tell you, though. After about three months of essentially the same lunch, every work day, chicken is kind of the last thing you want to eat. Not to mention the fact that grilling what amounts to about eight chicken breasts in one night and prepping them for lunches is really time-consuming.

Mmmm. Chicken. And Broccoli.

Mmmm. Chicken. And broccoli.

We are not about that life anymore. Or right now, at least.

And then, two weeks ago, we remembered that we have a crock pot and that it’s a life saver. We planned a recipe for the week that would not only not be chicken, but also be able to be thrown in the crock pot, and left alone for seven hours, so we could run errands and enjoy couch time without having to spend a chunk of our Sunday cooking.

Since we didn’t want chicken again, I suggested looking at alternative options at Costco – which, if you didn’t know, is one of the best stores on the planet. We ended up finding a huge pork loin (that could be halved, and frozen, and last us two weeks!) We got home, got to brainstorming, and put together this tasty recipe:

Ingredients:
3lb pork tenderloin (or whatever you have)

1 pineapple, chunked and thrown in the food processor until pureed

Teriyaki sauce, to taste

1 tsp-ish ginger

1 Tbsp-ish honey

Instructions:

Put tenderloin in crock pot – make sure it fits nicely, cut in half if needed. Peel pineapple, and cut into chunks. You can either leave your pineapple like this if you want big pieces in the final product, or you can use your food processor to puree it – I like this option better because it releases more of the juice. Cover pork in pineapple puree, add teriyaki, honey and ginger. You’ll notice that none of these measurements are accurate, because we don’t really measure – we eyeball. Oops. If you’d like, you can also add a little bit of BBQ sauce, too. I usually top my lunches with a little bit, too.

Cook for 6-8 hours, or until the meat falls apart.

That’s it! Super easy, super tasty, and a definite improvement over chicken and broccoli for months on end.

What are your favorite summer crock pot recipes? 

Recipe Box: Healthy Sesame Chicken with Broccoli

The past month and a half has consisted of takeout food for me and mine. Sad, but true. With moving house and getting settled, it’s been less about being healthy and more about just getting things done.

However, now that we are finally getting things in order, it’s back to cooking nightly. Which is great because it makes our house feel more like home.

I found this Healthy Sesame Chicken with Broccoli recipe on Feed Me Phoebe last year while doing the Advocare 24 day Challenge. It’s become a standby for our family and it’s pretty awesome because it’s fake-out food. Meaning it tastes like take-out but it’s not!

Huzzah! Cheaper, healthier, and absolutely delicious.

sesamechickenbroccoli

You ready for this?

Grab your ingredients!

Ones I usually have to buy at the store each time are:

  • 2 cups broccoli florets
  • 1 pound boneless skinless chicken breast, cubed
  • 1 red pepper, seeded and dice
  • 2 scallions, white and green parts separated, thinly sliced (I don’t usually use the green parts, tbh, but you can do as you wish)

Things I usually have on hand in the house unless I’ve run out:

  • 1 large egg white
  • 2 tablespoons cornstarch
  • 1/2 teaspoon sea salt
  • 1 tablespoon vegetable or coconut oil
  • 1 garlic clove, minced (I always “cheat” with a jar of minced garlic in the fridge)
  • 3 tablespoons gluten-free tamari
  • 1 teaspoon sesame oil
  • 3 tablespoons honey
  • 2 tablespoons sesame seeds (black or regular)
  • rice

Okay, so I always, without fail forget to get the rice going before the food and then about 2/3rds of the way through I’m throwing out curse words (quietly, because children) and rushing around to get the rice on the stove. So I’m going to put it right up here on the top. If you want to serve this WITH RICE, go on and get that going.

pepperandscallions

I always also forget to read ahead with recipes. My bad! Therefore, my suggestion to you is this: cut up your ingredients beforehand. That means cube the chicken. Clean and chop your pepper. Take care of the scallions. Get all the little things out of the way ahead of time so you can just toss things into your skillet and cook when the time comes.

In a large skillet, cover the broccoli florets with 2 cups of water. Simmer over high heat. Cover and then cook for a few minutes. Drain in a colander. Rinse and dry skillet.

Whisk the egg white, cornstarch, and salt in a mixing bowl. Add the chicken and coat.

This was around the time that I realized I had forgotten the rice.

This was around the time that I realized I had forgotten the rice.

Heat a splash of the vegetable or coconut oil in the same skillet and cook the chicken, about 2-4 minutes on both sides. Transfer to a clean bowl and set aside.

Add another splash of the vegetable or coconut oil in the skillet and stir fry your peppers and white scallions until lightly charred. Stir in the garlic and mix until fragrant. Add the chicken back into the skillet along with the tamari, sesame oil, honey, and sesame seeds. Simmer until the sauce thickens, about 2 minutes.

Add in the broccoli and green scallions (if you’re going that route) and mix.

Serve over rice and chow down!

finishedproductchickenandbrocc

It is amazing! Tonight I’m making another favorite here in my house, Skinnytaste Mongolian beef and broccoli, which is similarly amazing and has the same fake-out effect. Yes, please.

What’s on the menu at your house? Got a link? Share it with me, I’d love to check it out!

Recipe Box: Salted Caramel Cookie Bars

It’s been raining. For forever. Everything is wet and cold and terrible.

Consequently, I feel super unmotivated kind of all the time and basically hibernation seems like the best option.

I need summer, badly. I’m starting to feel like a slug.

So, to feel better, I bake. Last weekend was the last concert of my choir’s season and I volunteered to bring one of my favorite sweet treats: Salted Caramel Cookie Bars. I discovered this recipe last summer and it’s become one of my go-tos for birthdays and special occasions.

Let’s break it down really quick: layer of chocolate chip cookie dough, layer of salted caramel, layer of cookie dough.

emoji

These bars are ridiculous. On their own, the cookie bars would be delicious, but adding the layer of caramel is some next level ish. (And then, when you’re done with the bowl that you melted the caramel in, you can make whipped cream in it with your leftover heavy cream, and then your whole life will be magic. Because caramel flavored whipped cream.)

INGREDIENTS:
2 1/8 cups all-purpose flour
1/2 teaspoon salt
1/2 teaspoon baking soda
12 tablespoons butter, melted and cooled to room temperature
1 cup light brown sugar
1/2 cup granulated sugar
1 large egg
1 large egg yolk
2 teaspoons vanilla extract
2 cups chocolate chips
10 ounces caramel candy squares, unwrapped
3 tablespoons heavy cream
Sea salt, for sprinkling over caramel and bars
DIRECTIONS:
1. Preheat oven to 325 degrees F. Spray an 9×13 baking dish with nonstick cooking spray and set aside.

2. In a medium bowl, whisk together flour, salt, and baking soda. Set aside.

3. In the bowl of a stand mixer, mix the melted butter and sugars together until combined. Add the egg, egg yolk, and vanilla extract and mix until smooth. Slowly add the dry ingredients and mix on low, just until combined. Stir in the chocolate chips.

4. In a large microwave safe bowl, combine the caramels and heavy cream. Microwave caramels on High until caramels are melted, stirring every 20 seconds. This will take about 2 minutes, depending on your microwave.

5. Divide the cookie dough in half. Press half of the cookie dough into the prepared pan, smoothing the top with the spatula. Pour hot caramel over the cookie dough. Sprinkle caramel with sea salt. Drop spoonfuls of cookie dough over the caramel and spread dough with a spatula until the caramel is covered. Sprinkle the bars with additional sea salt.

6.Bake cookie bars for 30 minutes or until the top of the bars are light golden brown and the edges start to pull away from the pan. Cool bars on a wire rack to room temperature. Cut bars into squares and serve.

Recipe Box: Festive Black Bean Chili

This vegan recipe is a long-time love and even a fan favorite of my meat-eating friends. It was also among the first “real meals” I learned to make in my post-college life, back before Y2K.

Umpteen years ago I moved to Ithaca, a stunning and liberal college town nestled in the heart of the Finger Lakes. Back then, I was a 22-year-old college grad, a vegetarian and working my first job at the local newspaper, The Ithaca Journal.

Not two blocks away from my office, I came across a great vegetarian eatery that quickly became my go-to lunchtime haunt. The Moosewood Restaurant, known for its veggie and vegan fare, was widely known. I quickly fell in love with the food and in turn started acquiring Moosewood cookbooks. (Um, I confess I have more than a half dozen of them.)

This recipe, which I’ve adapted a bit over the years, was among the first I tried and remains one of my favorites. I hadn’t made it in years, but the other day, inspiration struck.

I forgot how damn good it was. So for you, my adapted version of Festive Black Bean Chili from Moosewood Restaurant Low-Fat Favorites.

feb March 2016 985

Ingredients:

1 diced onion

1/2 cup water

1 Tbsp. cumin

1 Tbsp. coriander

1 clove garlic, minced or pressed

1 green bell pepper, chopped

1 15-oz can black beans

1 15-oz can diced tomatoes

1 cup fresh or frozen corn kernels

1 cup salsa

salt and pepper to taste.

feb March 2016 979

In a large pot, brown the onion with garlic in 1/2 cup of water for about five minutes. Add the cumin, coriander and stir on high heat for about a minute. Add salsa and bell peppers, lower the heat and cover and simmer for about 5 minutes. Add the black beans and tomatoes and simmer for another 10 minutes. Add corn and continue to cook for another 10 minutes. Stir every now and again and salt and pepper to taste. I typically pair this with either cornbread or tortilla chips (hint of lime flavor hits the spot!) Sometimes I top it with avocado before serving.

Serves 4 people. Reheats well. Each 11 ounce serving has 222 calories and 10 grams of protein (that’s without the bread, chips or avocado!) Enjoy!

Happy birthday Meri (and Jay!) I used this because these two lovelies share a birthday!

Happy birthday Meri (and Jay!) I used this because these two lovelies share a birthday!

On a completely unrelated note, HAPPY BIRTHDAY MERI! Today is our chick’s 30-somethingth birthday and we love her to bits! Make sure to wish her a happy day via Scoot’s social media or in the comments below!