Ever since I started running, I’ve sort of become obsessed with running clothes. The sewist in me wants to understand their construction, function, and style, and then I make them for myself with my own twists. I always have to carry a lot of crap with me on the course. My car key, phone, earbuds, license, cash, and most annoyingly, my stupid, goofy-shaped inhaler that fits into no running waist belt I’ve found yet. I needed something custom made for all my stuff.
Then there’s the costume races where you are making your outfit top to bottom and need to hold a hotel key and extra pixie dust in your Tinkerbell tutu. The struggles are so real, especially as I begin to plan my costumes for the Rebel Challenge. I mean, where/how am I going to attach my lightsaber to my adorable outfit? I know the solution is to craft my own running skirt with a waistband pocket built into it. I practiced this idea with the Flintstones costumes I made for Meri and I, and now I’m sharing the technique with all of you.
YES. MY. FRIENDS. Are you excited? Please say yes because I am SO STOKED to show you this easy pattern. This will take you one afternoon. No joke. Heck, you can even skip adding the skirt and you’ll have a pocket belt that you can wear with anything.
Now, if you’ve sewn before, don’t let the word zipper send you screaming from your computer right now. If you’ve never sewn in your life, don’t let the word zipper send you screaming from your computer right now. This is simple stuff, friends, and if you have to do a zipper, this is the kind of easy zipper install you want to do. Trust. The trick is basting and using an invisible zipper foot, and I’ll get to that in a sec.
What to Expect: After you’re done with this project, you will have a running skirt with a 4 inch pocket that goes all the way around the waist for maximum storage. I have not yet mastered building in a sport panty, but I will master that for a future tutorial, promise!
Here is what you need for this project:
- Stretchy Athletic fabric of your choice. Follow the yardage guidelines on your skirt pattern, and add 1/3 of a yard for the waistband.
- Color Coordinating thread
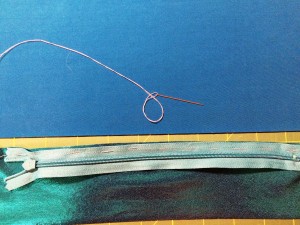
- Color Coordinating Invisible Zipper, minimum of 7-9 inches long (you can shorten a zipper very easily if you can’t find one the right length in the right color. Youtube how to, yo!)
- Skirt Pattern
- Stretch Sewing Machine needles, these are ball point needles made for sewing stretchy fabrics
- Invisible Zipper Foot
- Standard Presser Foot
- Zig-Zag Presser Foot
- Straight Pins
- Tape Measure
Tools that make any sewing job easier: Cutting mat, rotary cutter, large plastic ruler, fabric marking pen or tailor’s chalk
**These instructions include ½ inch seam allowances.
And here we go!!
Step 1: Read these instructions all the way through at least once before beginning.
Step 2: Measure your waist in inches. Take that number, divide it in half, then add 2 inches. This is your width measurement for cutting your fabric.
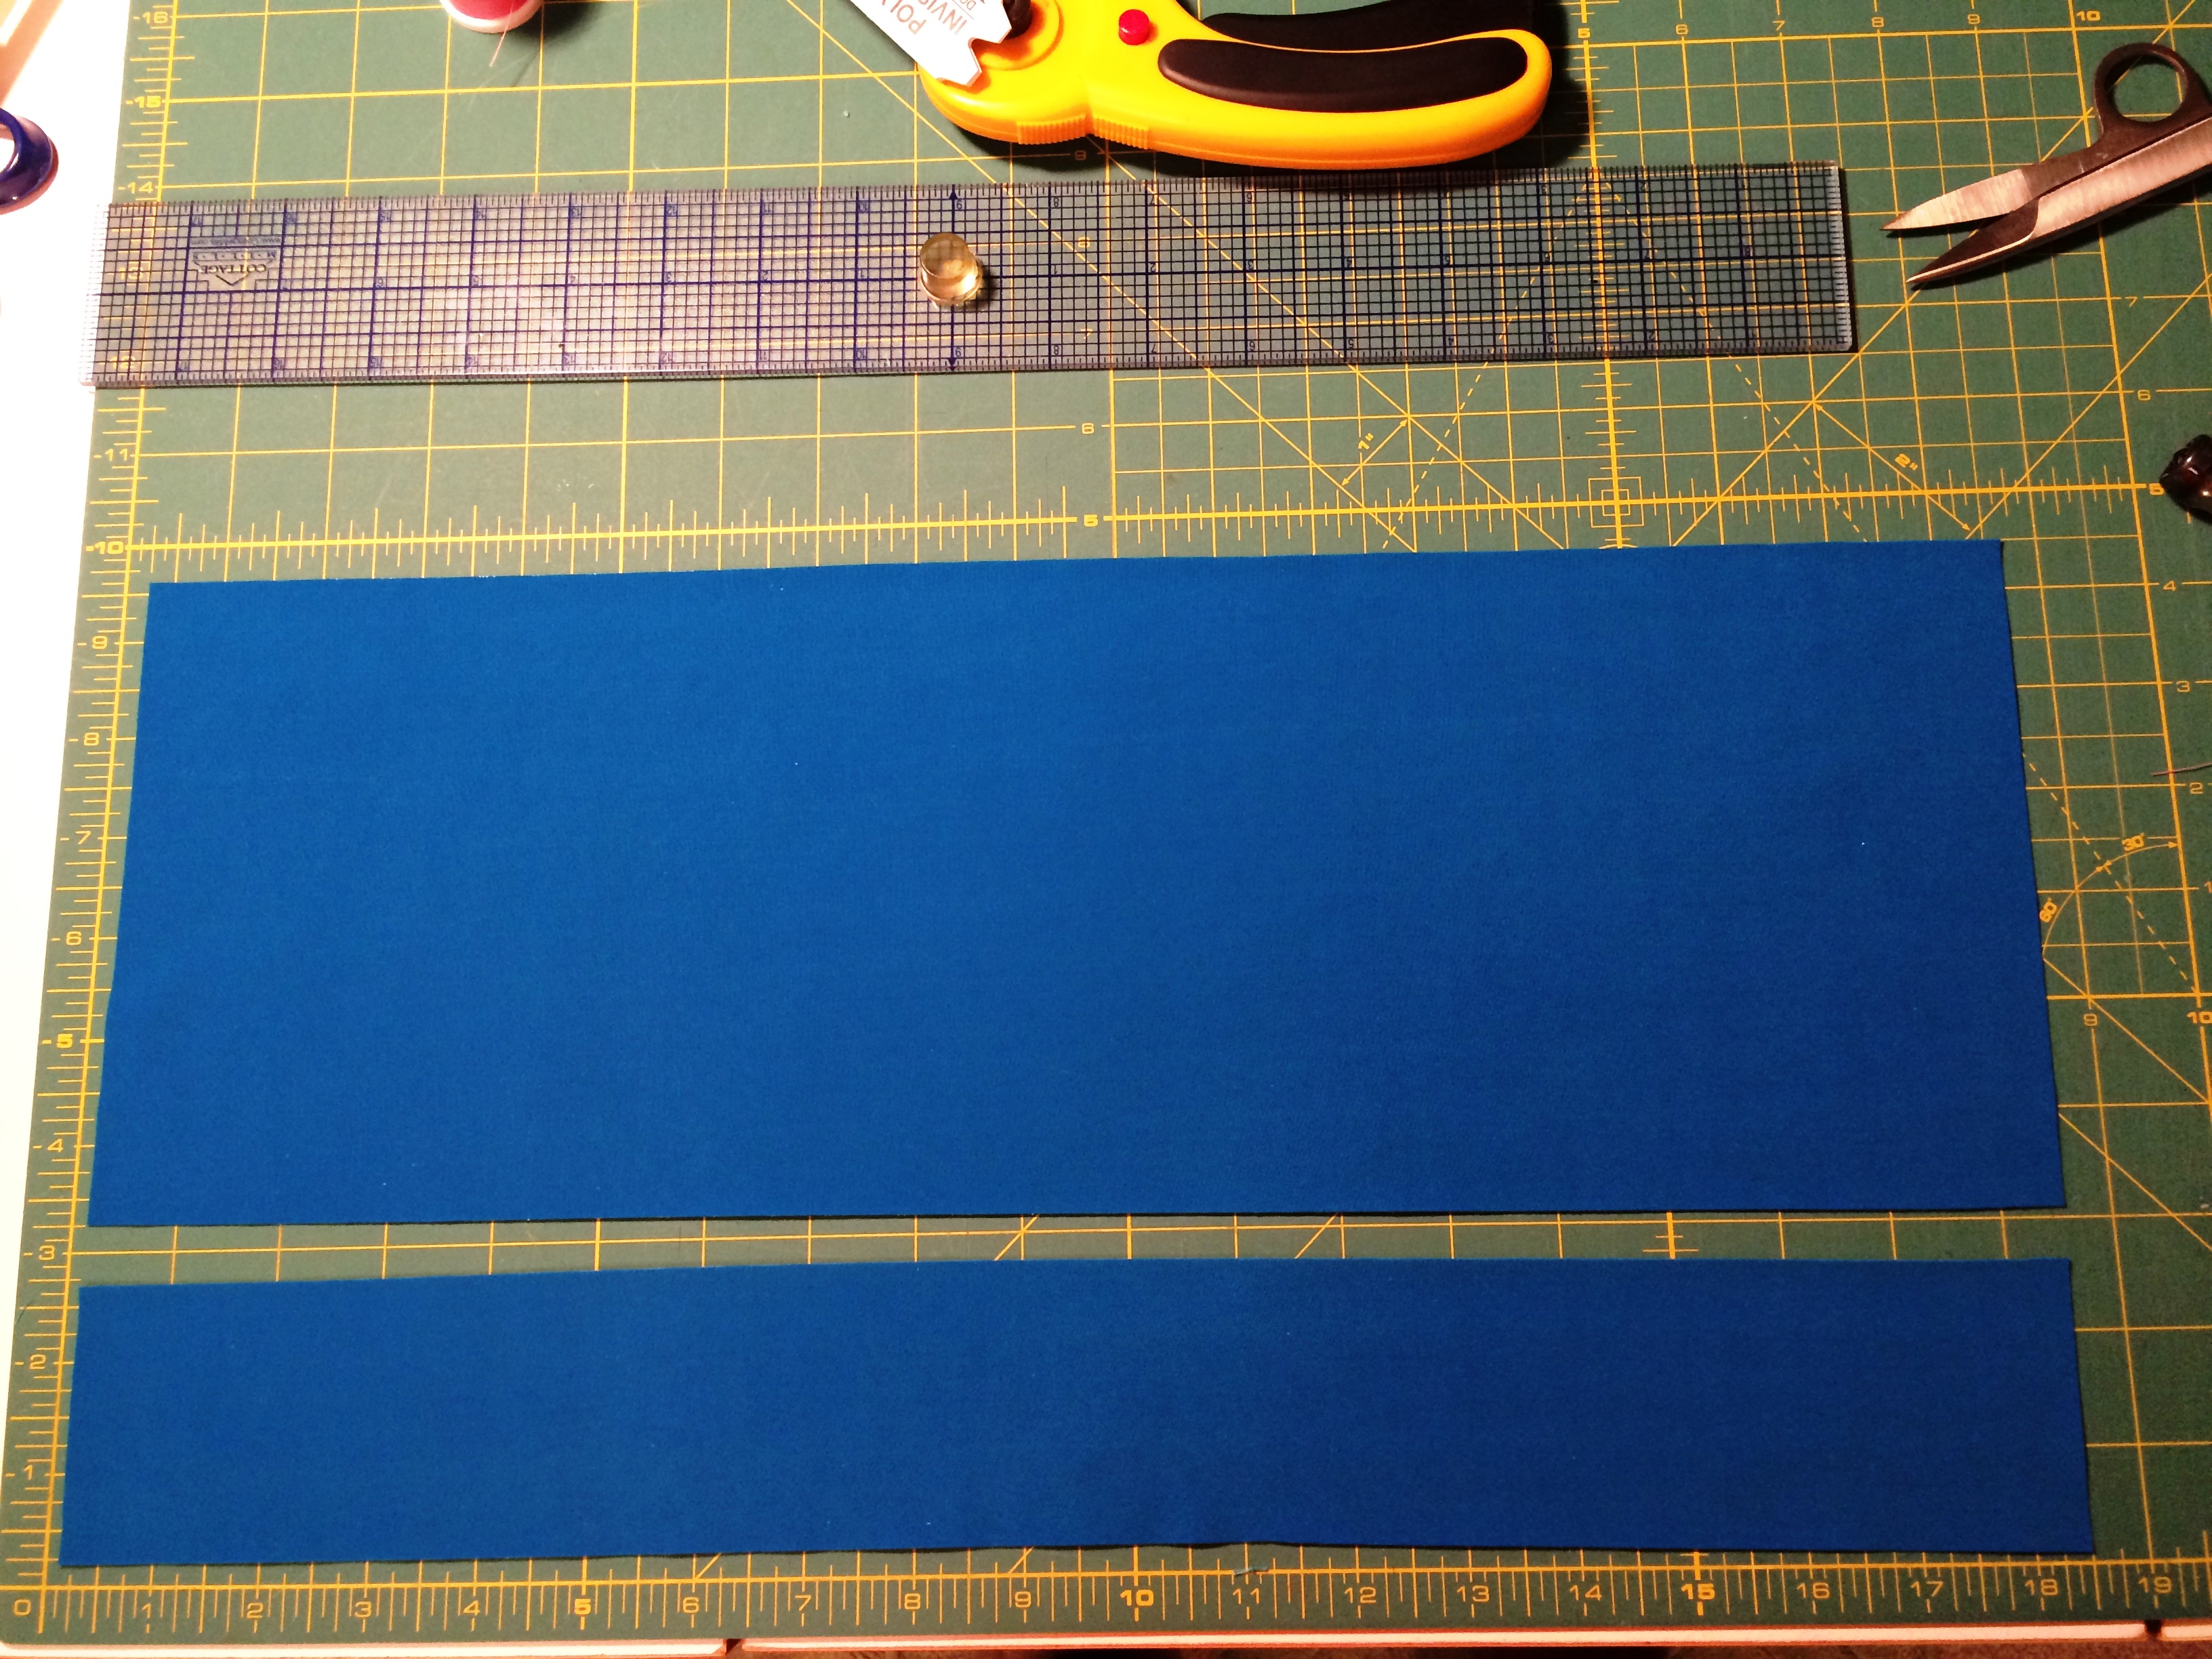
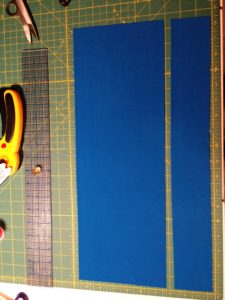
Step 3: Fold the fabric lengthwise right sides facing together, so that the selvage ends meet. Cut two pieces, 9* inches x the width measurement you got in step 1.
(*Note: This 4 inch waistband will accommodate an iPhone 5. If you have a larger phone or need a wider waistband, simply increase the number from 9 inches to whatever you need. Just remember that there is one inch built into this pattern for 1/2 inch seam allowances. Example, if you want a 5 inch waistband, 5 x 2 = 10 inches plus 1 for seam allowance, therefore, you would cut your two pieces 11 inches x the width measurement from step 1.)
Step 4: Set one of the two pieces you just cut aside. Lay the remaining piece flat and measure 2 ½ inches from the bottom edge. Mark this line with your fabric pen or chalk. Cut all the way across lengthwise.
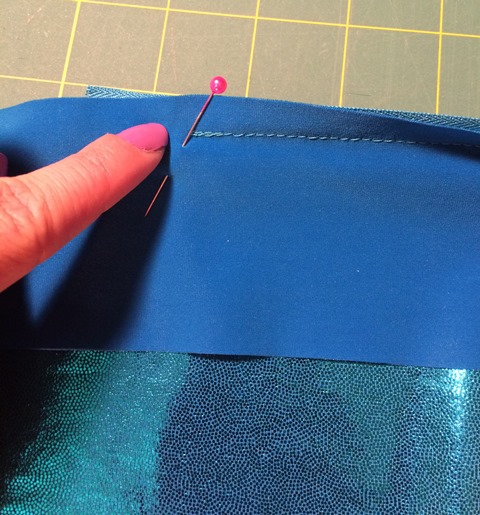
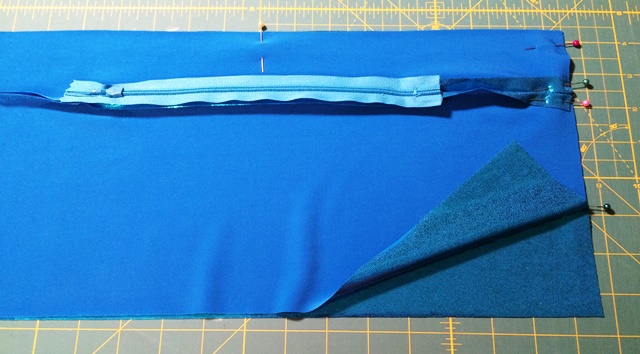
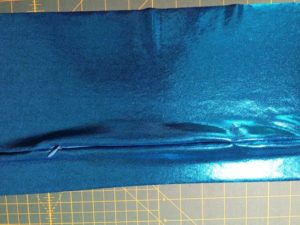
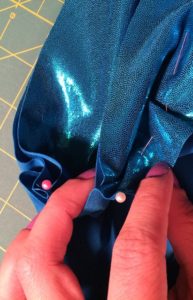
Step 5: Position your zipper in the center top edge of the smaller section. Baste the zipper in place with the right side of the zipper facing the right side of the fabric.
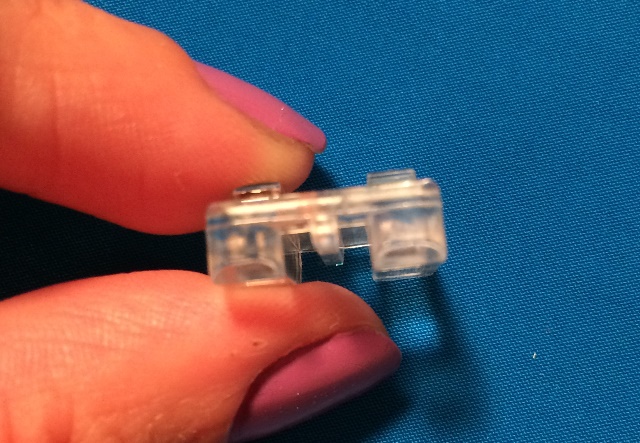
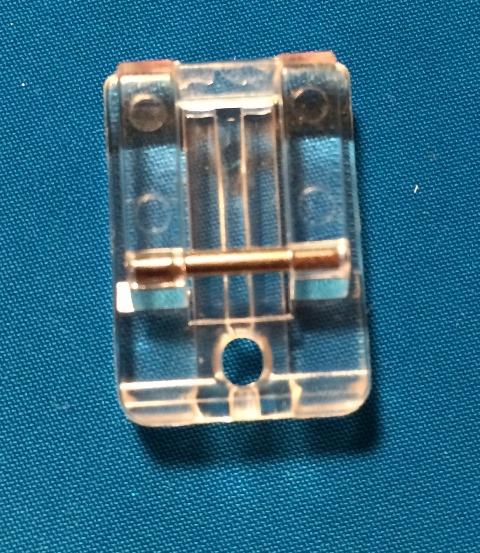
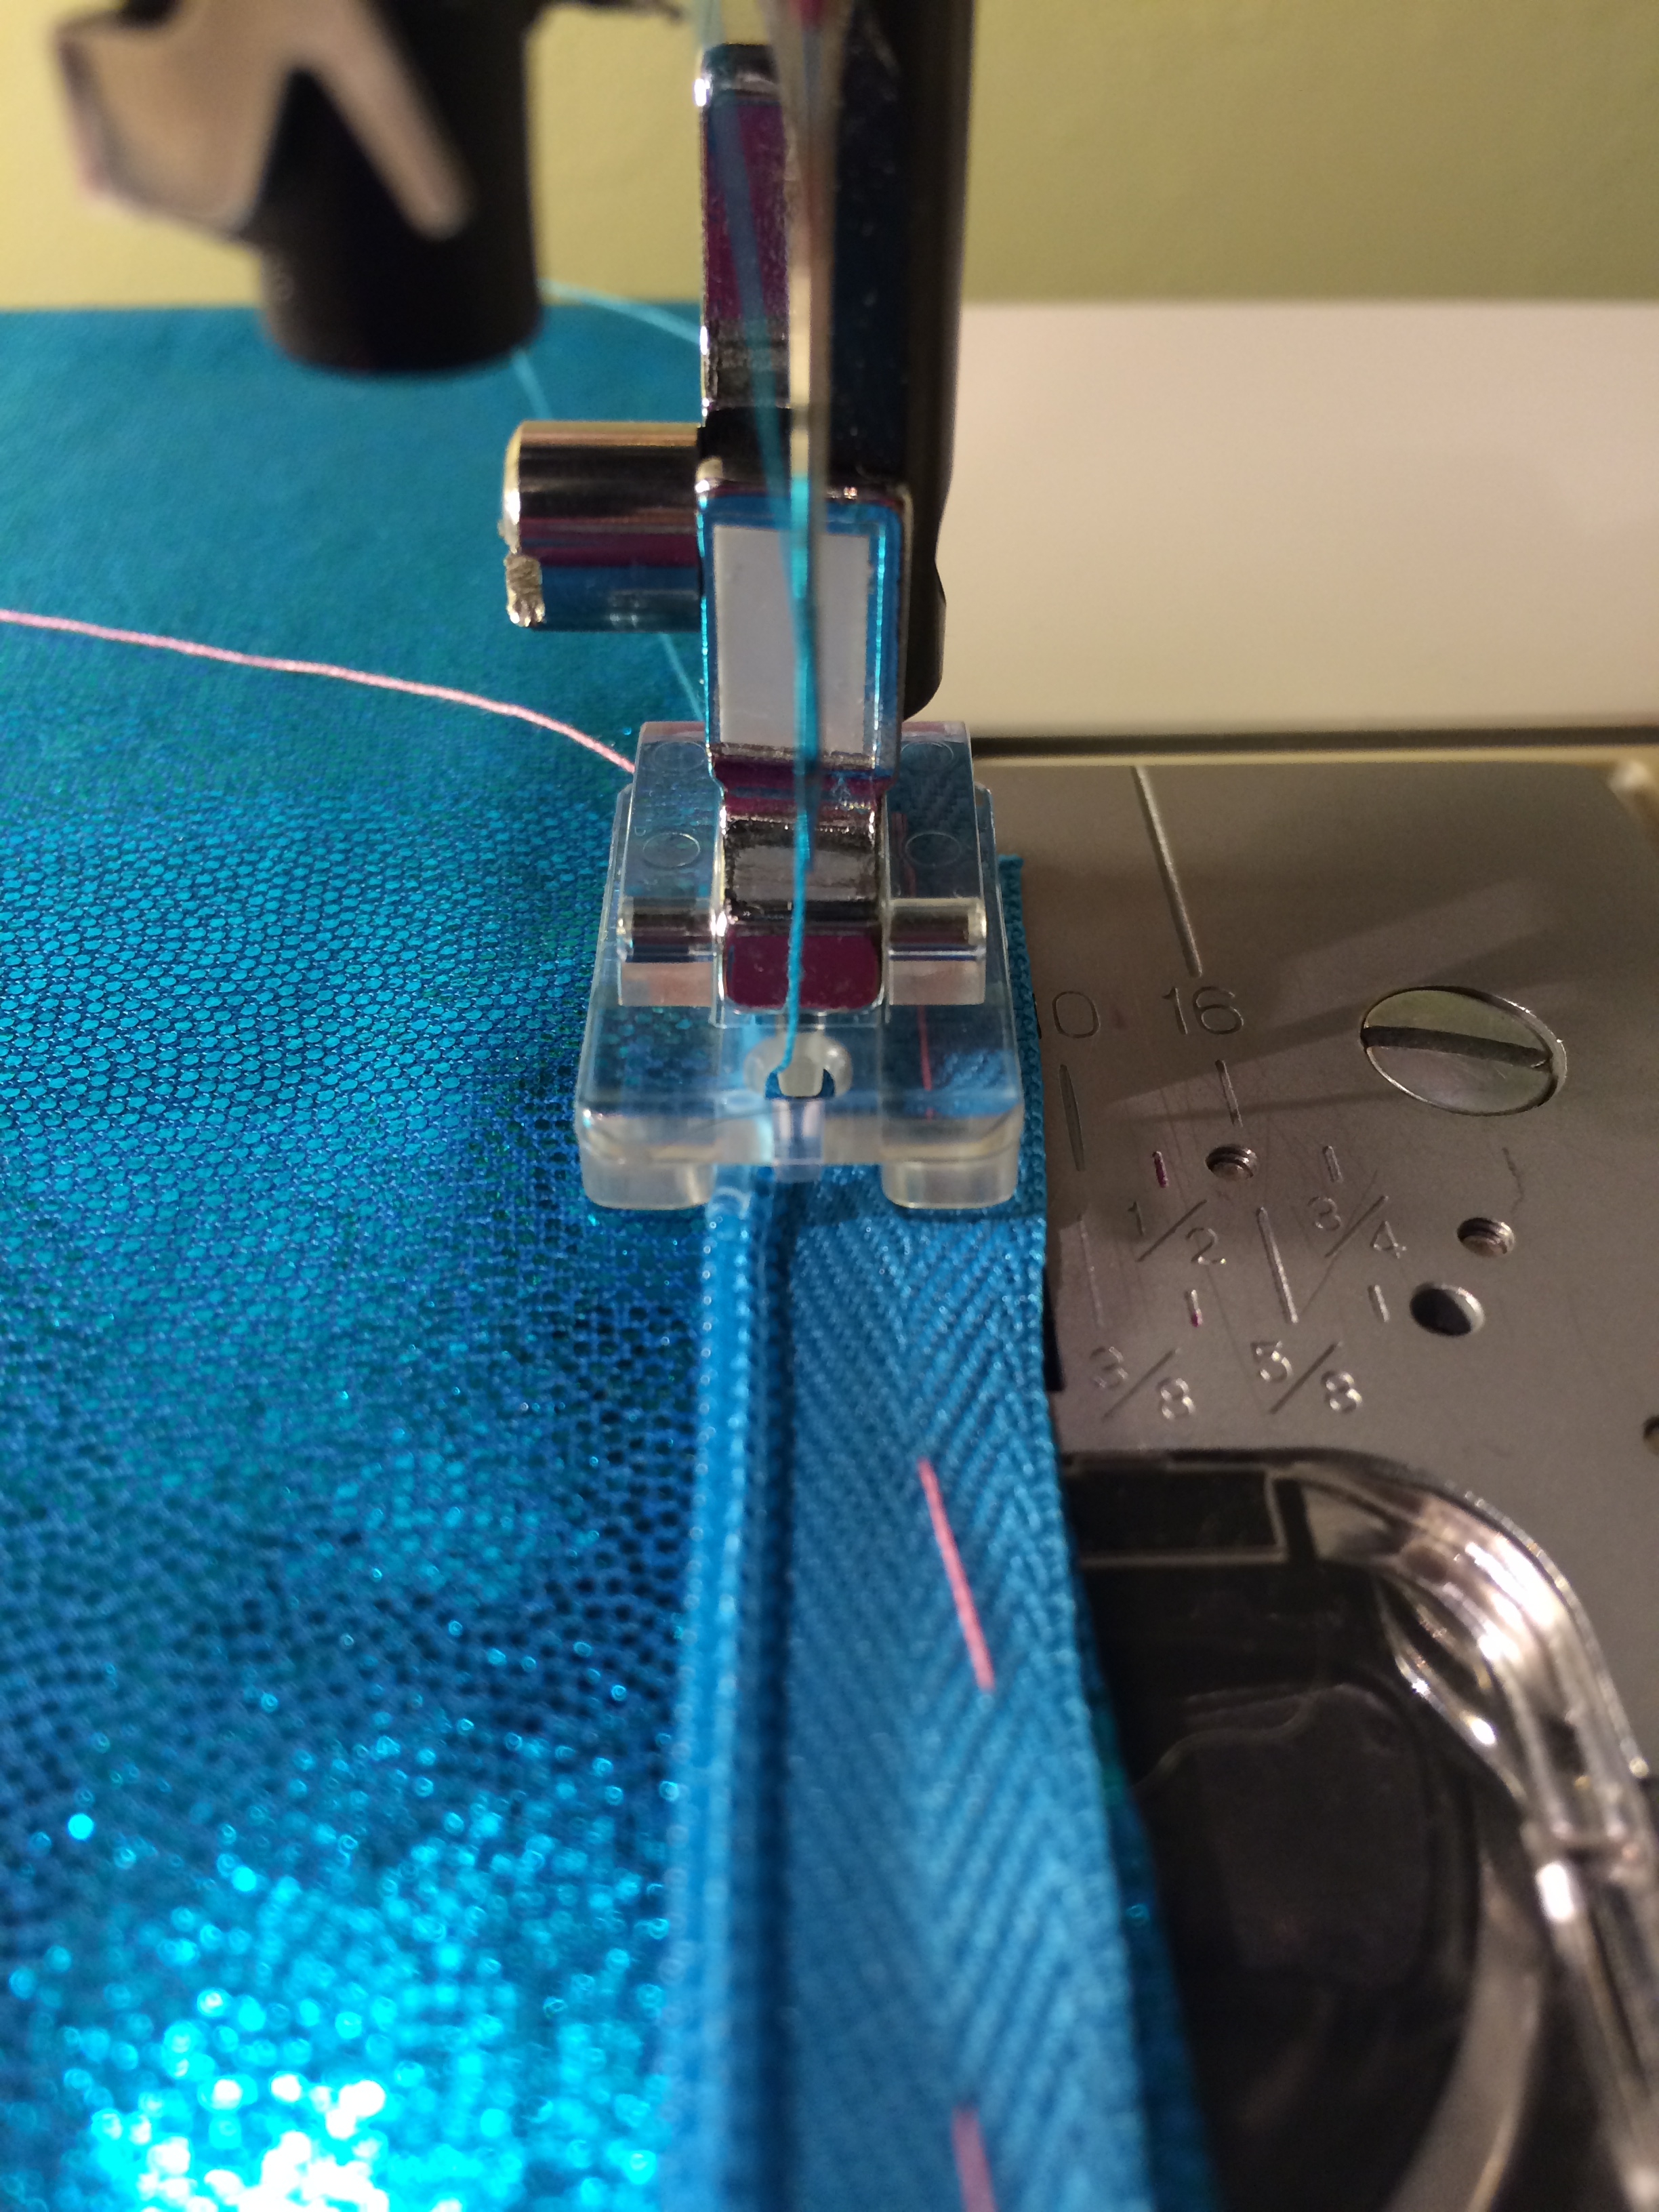
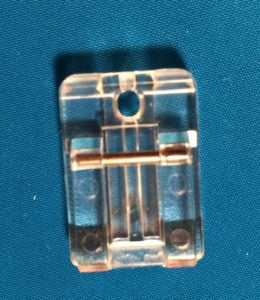
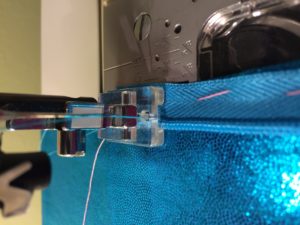
 Step 6: Next, you’ll need to use an invisible zipper foot. You can usually find universal versions of the invisible zipper foot at stores like Joann Fabrics or Hancock Fabrics. Notice the two grooves in the bottom center of the foot.
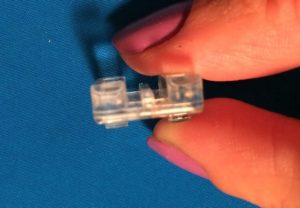 You’ll also notice the hole in the center, that is for needle to pass through.
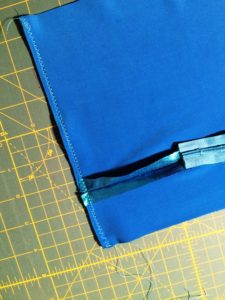
Position your work under the foot so that the zipper fits into the groove on the left. Make sure the zipper is open, and stitch using a straight stitch.
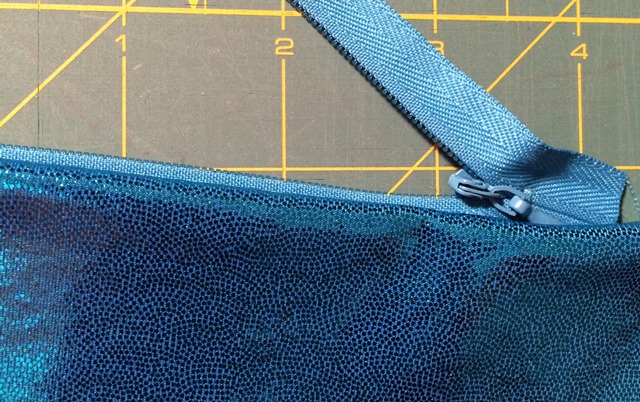
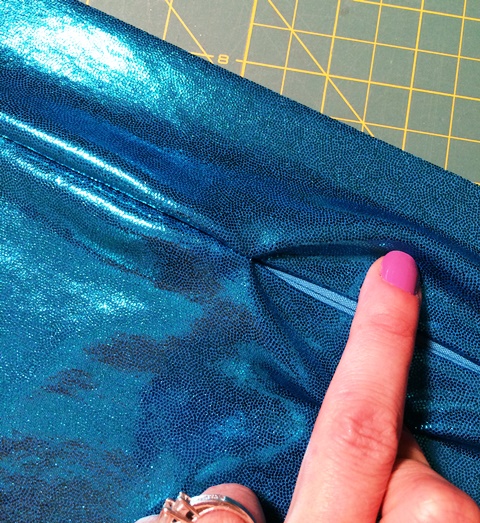
And when you’re done it should look something like this!
That wasn’t so bad, right?
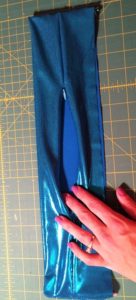
Step 7: Close zipper, remove basting stitches, and repeat Steps 4 and 5 the other side. Make sure to line up your pieces along the zipper edge and the short sides.
Basting ( big, chunky temporary stitches) is the secret to professional looking zippers. Take the time for this step!
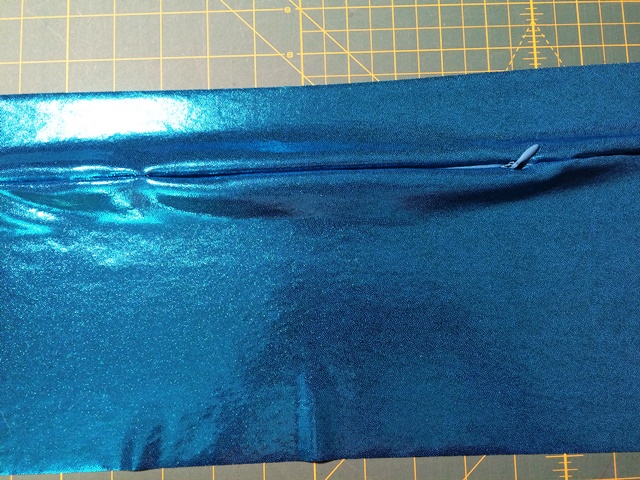
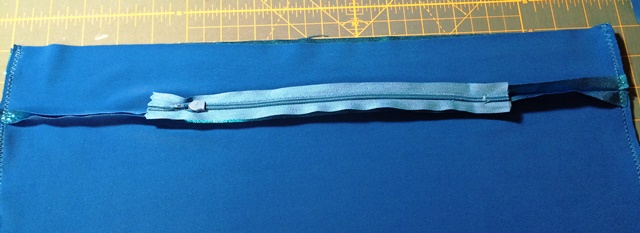
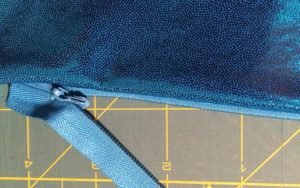
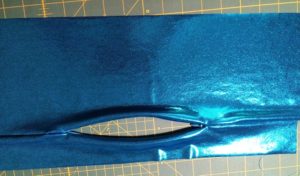
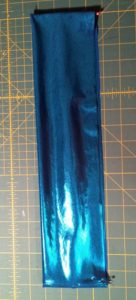
Step 8: Repeat step 5, stitching until the zipper’s pull gets in the way and you can’t stitch any further. When you’re done it will look like this: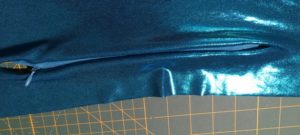 Don’t worry about the gaps on each end, we’re going to fix that next.
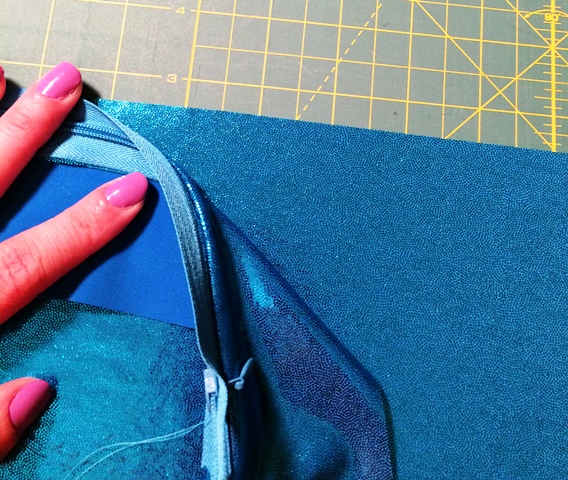
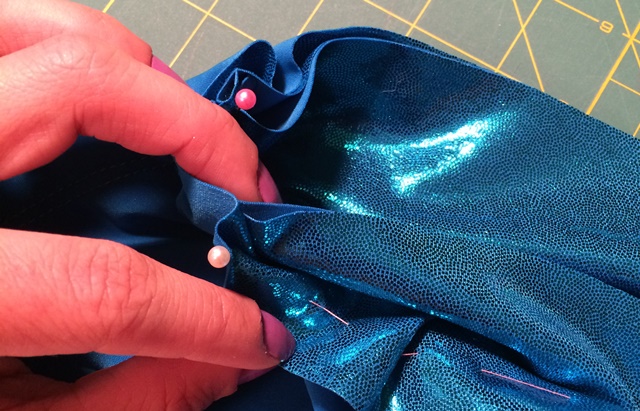
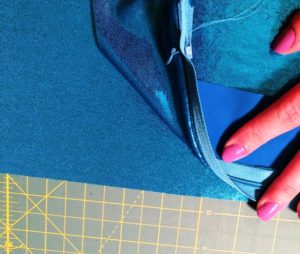
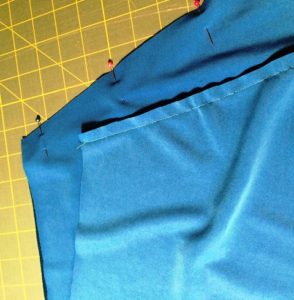
Step 9: Matching right sides of fabric together, pin from each end of the zipper to the edge of the fabric, being sure to match up the edges, too.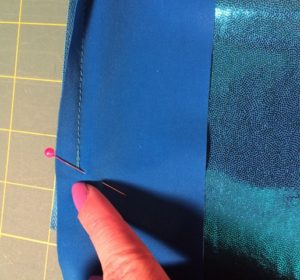
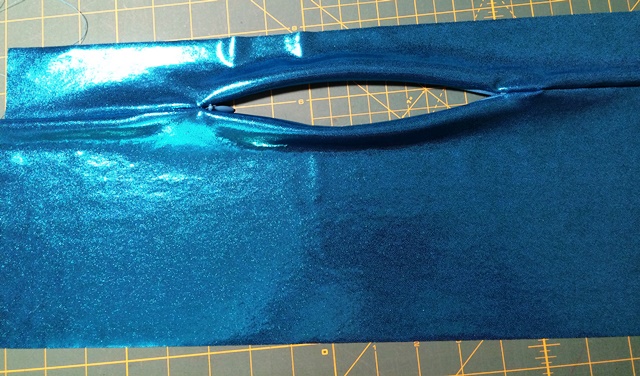
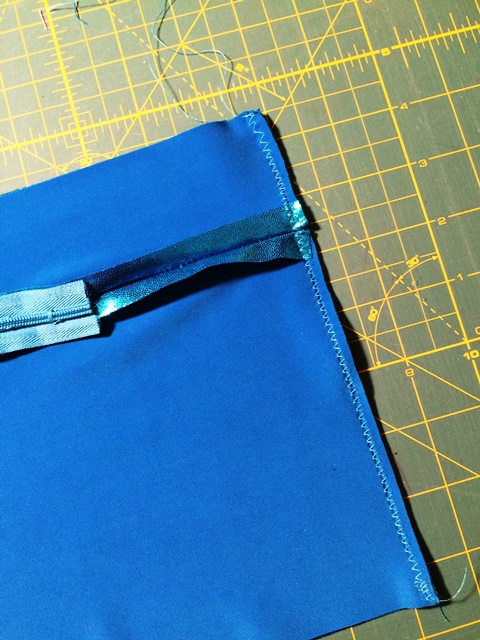
This is the trickiest part of this project; first, change your press foot back to a standard foot and stitch from where your zipper ends to the edge, thereby completing the seam and joining the two pieces of fabric all the way across. It may be a little bumpy and jagged around the ends of the zipper, but that’s okay. It will still work just fine!
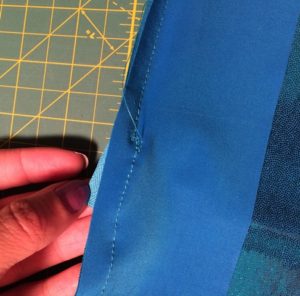
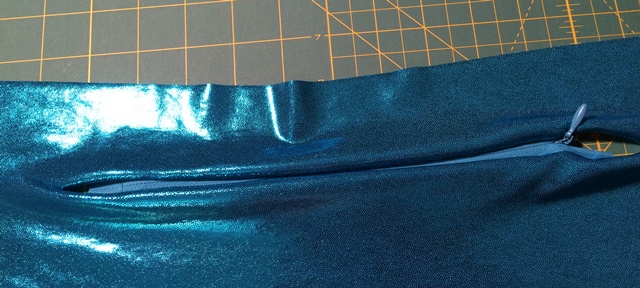
Mine was far from perfect but it’s all good.
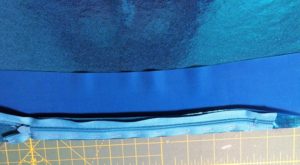
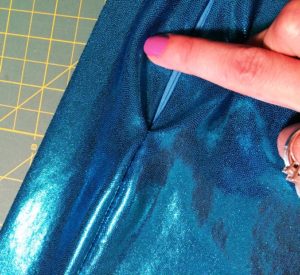
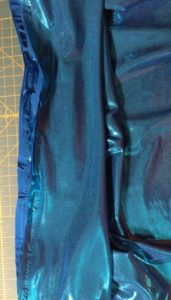
When you’re done, it should something look like this when you look at it from the right side.
CONGRATULATIONS! You’ve completed the hardest part of this project! You fricken ROCK! We are seriously SO CLOSE to being done!
Step 10: Remember that other piece of fabric that you cut and I told you to set it aside? Well bust that puppy out and let’s do this! Line it up with the zippered piece right sides together, and pin it along the short sides.
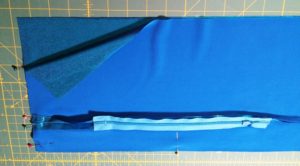
 Change your foot to a zig-zag foot and adjust the settings on your machine as appropriate. Zig-zag stitch the pinned sides.

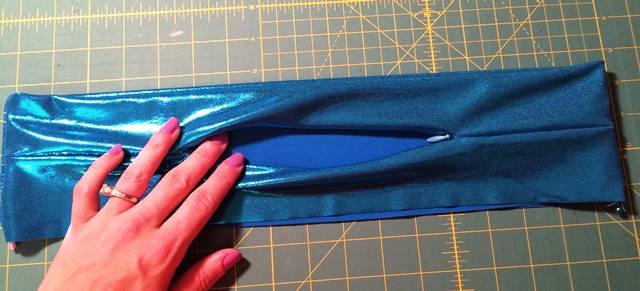
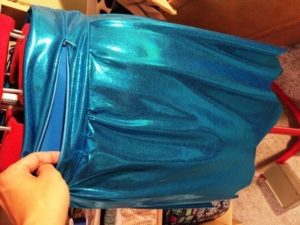
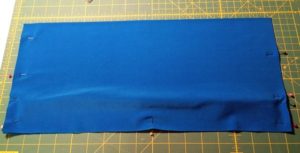
Step 11: Turn the waistband right side out and try it on! Woot woot! If it’s too loose, now is the time to take it in. Simply turn it inside out again and stitch the side seams in a little further from the edges. Repeat that process until the band fits over your hips but also fits your waist. Because you’ve been using a zig-zag stitch where needed, the skirt will stretch. Once you have it fitted, trim off any excess seams/fabric on the inside and turn it right side out.
Pocket Belt Option: If you want to make a pocket belt instead of a running skirt, then this is is your last step. Tuck the two touching raw edges to the inside of the band, making a seam. Essentially, you’re making a tube. Once you tuck the edges and pin in place all the way around the bottom edge of the band, top stitch using a zig-zag stitch. When you’re done, you should have a fabric tube, like a bicycle tire, with a zipper. (Oh my goodness, I hope that makes sense).
Step 12: Using a skirt pattern, cut the front and back skirt pieces following the layout instructions that come with the pattern. Pin the front and back of the skirt together, right sides facing each other. Using a straight stitch, stitch the two sides together.
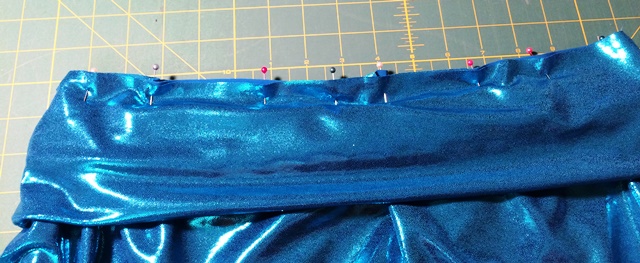
Step 13: For a pleated skirt look, baste along top edge of skirt. Gather the skirt fabric until it is the same circumference as your waistband, making sure the pleats are evenly distributed all the way around the skirt.
If you want an a-line style skirt, use an a-line skirt pattern or simply skip the gathering step above and adjust the skirt until its waist is the same size as your waistband.
Step 14: Pin the raw edge of the waistband to the raw edge of the skirt with the right sides together. Make sure to match the side seams of the skirt with the side seams of the waistband.

Step 15: Using a zig-zag stitch, attach the skirt to the waistband.
Step 16: Shorten the skirt to desired length and trim off excess. Athletic fabric typically doesn’t fray and won’t need hemming, but if your fabric is fraying you’ll need to hem your skirt. To do that, fold the raw edge to the inside of the skirt 1/4 to 1/2 inch all the way around, and then another 1/4 to 1/2 inch all the way around. Pin in place as you go. Then, top-stitch using a straight stitch.
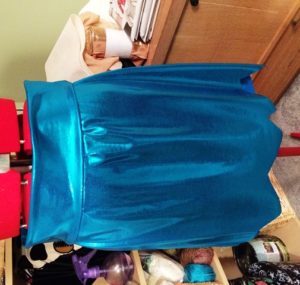
YOU ARE DONE! HIIIIIIGH FIVE, YOU! You now have a cute, functional running skirt that you made YOURSELF. I’m so proud of you!

Now, I want to see YOUR skirts. So go forth, dust off your sewing machine or rescue one at your local Goodwill, and send me your pics! I’m excited to see what you guys come up with! Share your pics on our Facebook page or tweet me at @Scootadoot or @jenniferspen
I’ve never written out my patterns before. If I’ve utterly confused you, I’m sorry, and I want to fix it! Please email me your questions at Scootadoot@gmail.com with the subject “Skirt Tut” and I will respond to you as soon as I’m able.
**This design did come out of my head, and any resemblances to patterns currently for sale in the market place is coincidental. No copyright infringements were intended.