
A while back, I posted about my plan to make a medal rack and share it with you, and this weekend, the planets finally aligned to allow me the time to get my craft on. Of course, there are a few things that always make DIY projects better.
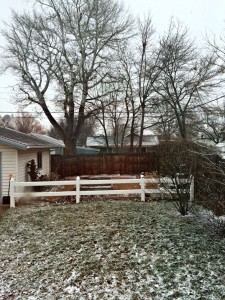
Things like a snowy morning.
And Colin Firth as Mr. Darcy.

So, now that we’re all in agreement on that, let’s proceed, shall we? Here’s what you’ll need for this project:
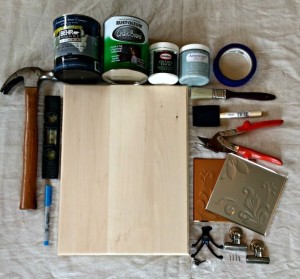
Supplies:
Wood plaque of your choice Chalkboard Paint Magnetic Clips
Primer 2 Coat Hooks Aluminum or Tin Strip
Paint Tinted color of your Choice Picture Frame Hook and Nails
Tools:________________________________________________________________________
Hammer Ruler Level
Pencil Marker Sandpaper or Sanding Block
Drill or Screwdrivers Painter’s Tape Bristle Paintbrush
Foam Tip Paint Brush Fine Tipped Paint Brush for Touching Up
______________________________________________________________________________________
Step 1: Using a fine grit sandpaper or sanding block, lightly sand any rough areas on your wood piece. Pay attention to edges and corner in particular.
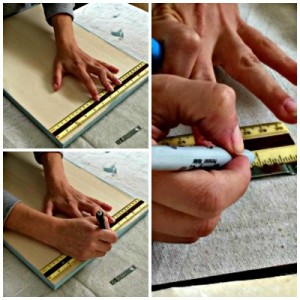
Step 2: Using a piece of paper, make a template for your chalkboard area to help you decide where you want it on your plaque. Once you have decided on placement, mark the corners with a pencil.
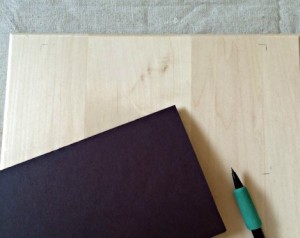
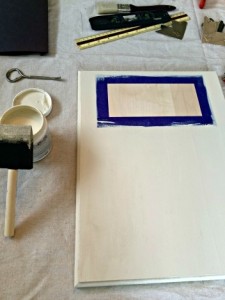
Step 3: Using a ruler and pencil, outline the desired area. Make sure your lines are straight and centered. Tape off the inside of your area with painters tape. Later you will paint the inside of your rectangle with chalkboard paint.
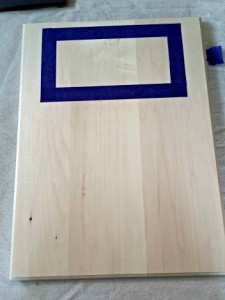
Step 4: Paint your plaque with primer. Be careful not to get any in the taped off area. Let dry.
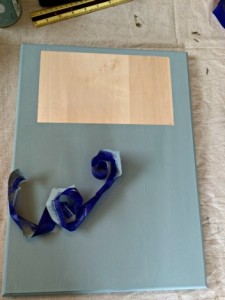
Step 5: Paint over the primer with your tinted paint. Let dry.

Step 6: Paint a second coat of your colored paint. Once it’s dry, remove the painter’s tape.
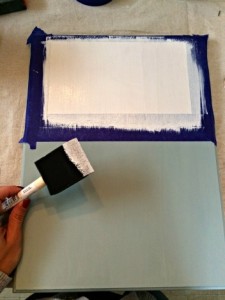
Step 7: Tape off the painted area around your chalkboard area. Paint the bare wood with two coats of primer. Allow each coat to dry thoroughly, and sand lightly between coats. This will help ensure a smoother writing surface once the chalkboard paint is applied.
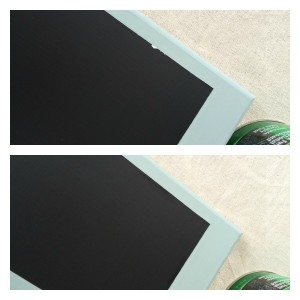
Step 8: Apply two coats or chalkboard paint, allowing each coat to dry completely between coats.

Step 9: After the chalkboard paint is dry, remove the tape. Touch up any areas with a small tipped paint brush if needed.
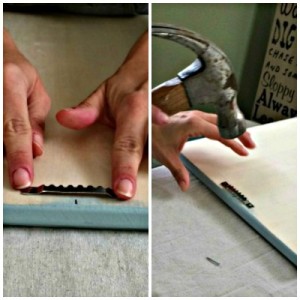
Step 10: Affix the tin strip (or pieces, as the case may be). Decide where you want your bibs to hang, and using a pencil, outline the strip. Nail in place. I had some tin tiles laying around my house, and used tin snips to cut them to the desired shape and size.
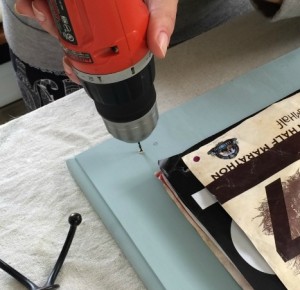
Step 11: Affix the picture frame hanger on the back. First, find the center of your plaque and mark it with a pencil. Then, find the center of the hanger and mark it with a marker. Next, align the two marks and nail your hanger to your plaque.
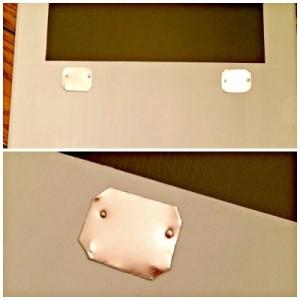
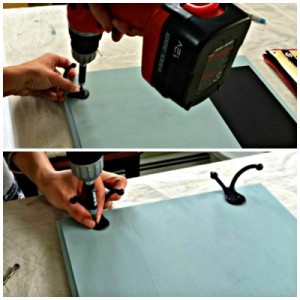
Step 12: Affix your medal hooks. Decide where you want them to go, and mark the screw holes with a pencil. It’s easier to start the holes using a drill and a bit. Using the hardware that came with your hooks, attach them to your plaque.
Step 13: Celebrate because YOU ARE DONE. And you rock! All that is left to do is hang your new medal rack. Then, attach your bibs to the clips and hang your bling from the hooks. Look how awesome you are!
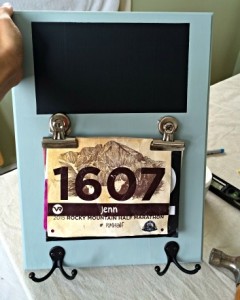
I had my magnetic clips a little crooked in this shot, but you get the idea.
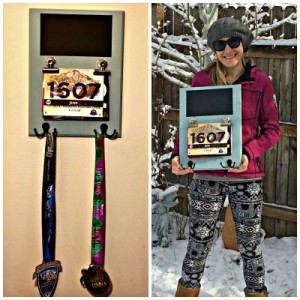
I am loving how this project turned out. Now, I just need more medals to hang from it!
How do you display your medals? Have you made your own rack, or anything else, for that matter? Tell me all about it in the comments!
Super duper cute, Jenn! Right now all of my medals are in a bin because we are trying to prep our house to sell (eventually) and I don’t want to make the buyers feel bad if they don’t run. 😉
This is awesome! I’m so stealing this idea 🙂